Many of my projects are line illustrations that can be either used as-is or decorated with colored background pieces. I give a few tips in the PDFs included with the projects, but I thought it would be a good idea to go into more detail here. I used the Two Vases project as an example.
The outline illustrations, like the one above typically, have very contour and thin shapes, making a sharp blade a must. So there's my first tip.

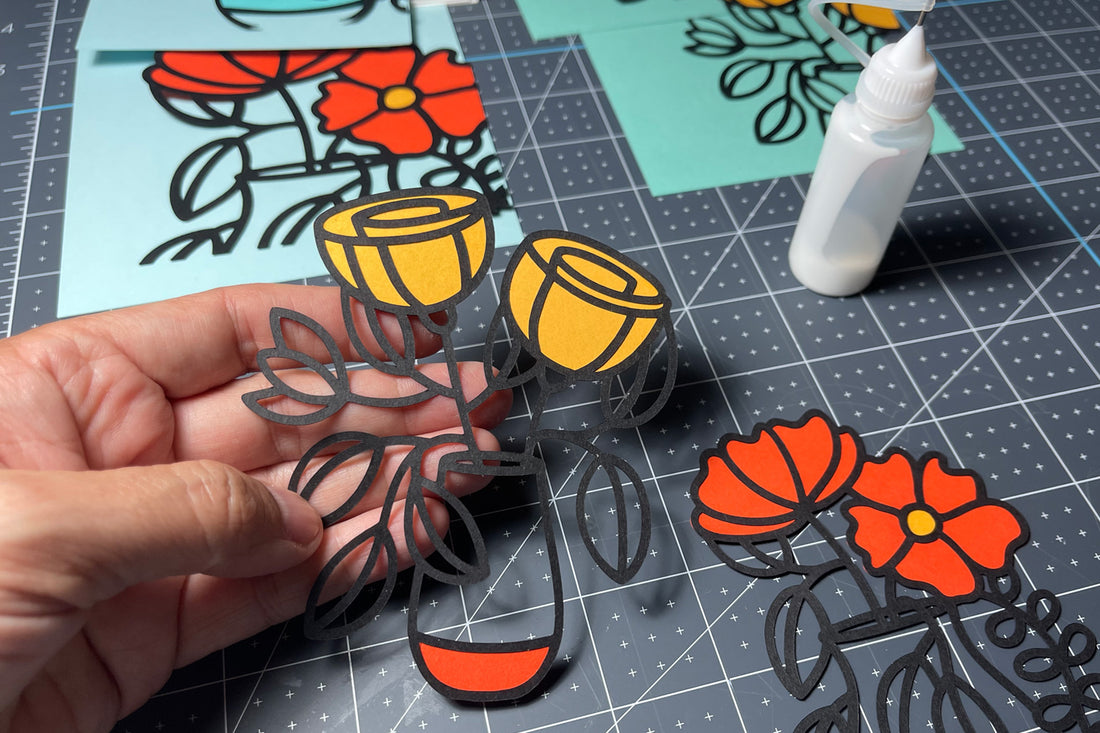
My second suggestion is to have a glue bottle with a very thin applicator. I recently discovered these bottles, and they have saved me so many headaches—no more messy glue spots on my projects. I use a bottle like the one above or here. I add tiny dots along the edges of the area where a colored piece of paper will be attached and gently attach the pieces, careful not to smear the glue. Notice that I make the colored pieces of paper slightly smaller so that the edges are hidden.

Once I've attached all the background pieces, I use spray adhesive to attach the finished embellishments to the background or the card itself. Small glue dots work, but the project starts to warp when I've used liquid adhesive on larger surfaces. On the other hand, the spray offers an even coat that makes for a cleaner project. If you're not used to this adhesive, know where you will place something before spraying a piece. It helps to use little pencil marks as guides. If you've never used it, practice with scraps of paper to get a feel for it.
You may wonder about the scissors. I used them to trim the edges of the card artwork in spots where I didn't perfectly align the flowers to the background piece. There's nothing nicer than a clean edge.
This Two Vases card project inspired this post. As I was working on it, I realized I'd never gone into this much detail about this process before. It isn't very innovative or new, but I hope you find it helpful.
2 comments
I don’t, but that’s a great idea! I’ll definitely start doing that. Thank you for sharing!
do you also include a jpg or png file. some of these would be great to print on a laser printer and foil.